AI Skincare Texture Photography Prompts: 10 Material Studies
AI skincare texture photography prompts describe how a cream, serum, gel or balm should look in a controlled product scene. Start with one material, one visible shape and one support surface. Then define the camera angle, the light direction and the edge detail that makes the texture readable. These ten complete briefs cover cream swipes, serum droplets, gel folds, balm scoops, clay-mask swatches, cleanser foam, oil pools, lotion ribbons, a three-texture arrangement and a blank tube with a swatch. Use them to plan fictional, unbranded concepts. When an image must represent an actual product, compare it with an authorized photograph of the real formula and packaging. Generated appearance cannot establish ingredients, efficacy, SPF, suitability for a skin type or results on skin.
By Nano Banana Studio · · Fictional material concepts
Choose an observable material behavior. A raised cream edge, a transparent droplet and a visible gel fold are specific photographic instructions. Words such as luxurious or fresh can guide styling, but they do not define the texture.
Plan skincare texture photography around one visible feature
Decide what the image needs to explain before adding packaging or props. A cream swipe can show a thick ridge and a thin taper. A serum droplet can show a curved boundary and a small contact shadow. A gel fold can make translucency and thickness visible in the same frame. Give the image one main job so its success can be judged from the finished shape.
Describe the material separately from the photographic treatment. Name the opacity, color, gloss and shape first. Add a plain support surface, a camera angle and a broad light source. A highlight should help you follow a surface; it should not cover the edge that distinguishes one texture from another. Keep food, botanical props, ingredient illustrations and decorative splashes out of the first attempt.
The samples below are independent fictional studies. Similar white creams across different prompts do not represent one consistent formula or product range. For packaging-focused work, continue with the product-design prompt handbook. This guide concentrates on visible texture, separation, light and contact with the support surface.
Use a complete texture brief, then change one variable
- Select one material study. Choose the shape you need: swipe, droplet, fold, scoop, foam cluster, pool or ribbon. Keep its count and support surface explicit.
- Copy the complete prompt. Keep all eight parts together: Task, Subject, Context, Style, Composition, Lighting, Constraints and Output. Removing the exclusions can introduce jars, hands, labels or extra droplets that change the task.
- Generate and save the exact wording. Use the prompt in GPT's built-in image tool. Save a changed brief with its own result when adjusting the color, angle or material.
- Inspect shape before styling. Follow the outer boundary, count the separate forms and trace the contact shadow. Then inspect the thick and thin areas, transparency, surface detail and any clipped highlights.
- Prepare the real placement. Check delivered dimensions and the intended crop. Add accurate brand artwork and commercial copy in a separate editing step. If the image represents a real item, review formula appearance and packaging against a suitable authorized reference.
The prompt text is free to copy and adapt. Image generation availability and limits depend on the tool you use. The examples provide photographic directions, rather than measurements of viscosity or evidence of product performance.
Skincare cream swatch prompts and liquid texture setups
Use this table to select the first setup. Ratios describe the requested composition, not a fixed requirement for every store or social channel. Check the actual delivered dimensions before exporting.
| Visual task | Starting prompts | Requested ratio | Light and background | Priority check |
|---|---|---|---|---|
| Opaque texture edge | Cream swipe · 01; clay-mask swatch · 05 | 1:1 | Neutral surface, soft side light | Raised material, readable taper and grounded shadow |
| Clear or translucent material | Serum droplet · 02; gel fold · 03 | 1:1 | Plain support with controlled highlights | Continuous boundary, visible thickness and restrained reflections |
| Dense scooped texture | Balm scoop · 04 | 1:1 | Soft studio light, uncluttered surface | One cohesive mound with shallow tool marks |
| Air and flowing forms | Foam cluster · 06; lotion ribbon · 08 | 1:1 or 2:3 | Broad soft key and gentle fill | Bubble hierarchy or a single connected ribbon |
| Shallow liquid surface | Facial-oil pool · 07 | 1:1 | Simple surface and a long soft reflection | One bounded pool with no falling splash |
| Multiple visual elements | Three textures · 09; tube and swatch · 10 | 3:2 or 16:9 | Shared support and one light direction | Exact count, clear separation and complete product edges |
10 skincare texture setups: swipes, droplets and material contrasts
Choose a complete brief below. Each setup includes an intended use, concrete inspection points, adjustable variables and a repair for a common failure. The forms describe fictional materials; terms such as cream, serum and oil identify the visual task and do not verify a formulation.
- 01 · Opaque cream swipe with a raised ridge
- 02 · Clear serum droplet with a readable boundary
- 03 · Translucent gel fold
- 04 · Semi-solid balm scoop
- 05 · Matte clay-mask swatch
- 06 · Connected cleanser foam cluster
- 07 · Facial-oil pool and meniscus
- 08 · Continuous lotion ribbon
- 09 · Three distinct texture samples
- 10 · Blank tube beside one cream swatch
Opaque cream swipe with a raised ridge
Beauty teams planning a cream-texture close-up.
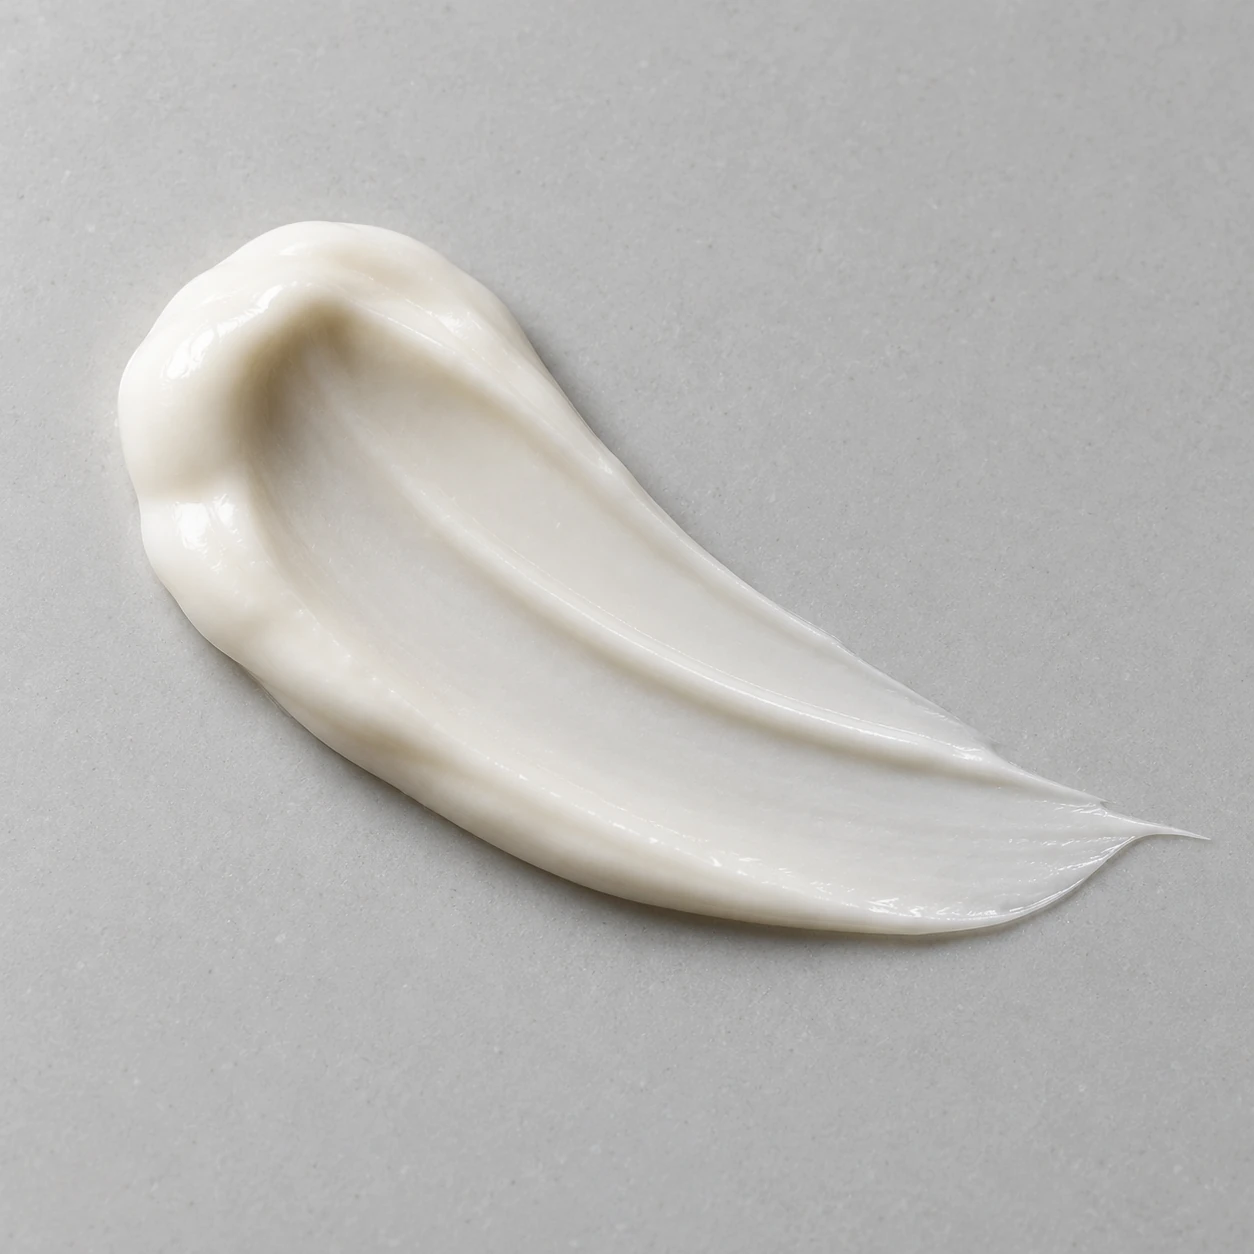
Use one swipe to make the change from a raised ridge to a thin spread easy to inspect. Keep both ends in frame so the texture has a readable shape rather than becoming an abstract white field.
Task: Photograph one opaque skincare cream swipe to study its surface and thickness.
Subject: One ivory-white fictional cream swatch, spread in a single short curved stroke with a rounded thick starting mound, two shallow parallel ridges and one thin tapered end.
Context: A skincare art director needs an isolated material reference for a texture-led content brief, without packaging or efficacy claims.
Style: Photoreal macro product photography, delicate real-looking surface irregularities, neutral color and restrained retouching.
Composition: Top-down square frame on a clean pale-grey matte ceramic tile. Place the complete diagonal swipe in the central two-thirds, with generous empty margins and a visible continuous footprint on the tile.
Lighting: Large diffused side light from the upper left, gentle low shadows beside the ridges and broad restrained highlights on the cream.
Constraints: Exactly one connected cream swipe, opaque rather than glassy, with a visibly thicker rounded end and a thin trailing edge. No container, utensil, hands, plants, ingredient props, text, logos, watermark, airborne cream or extra swatches.
Output: One finished 1:1 image at the closest supported native size. A single continuous photographic scene, not a collage, contact sheet, illustration or mockup interface.
- Count one cream sample and follow its continuous outline.
- Inspect the raised edge, thin taper and contact with the support.
- Check that highlights preserve visible material detail.
Adjust the brief
- Color
- Ivory or another fictional cream tone; preserve opacity.
- Shape
- One continuous swipe with a distinct thick end and taper.
- Light
- Broad side light with a soft contact shadow.
If the image misses the brief
If it looks like clear gel, explicitly repeat opaque ivory cream and remove translucent or glass-like wording.
Clear serum droplet with a readable boundary
Creators planning a clear-serum visual direction.
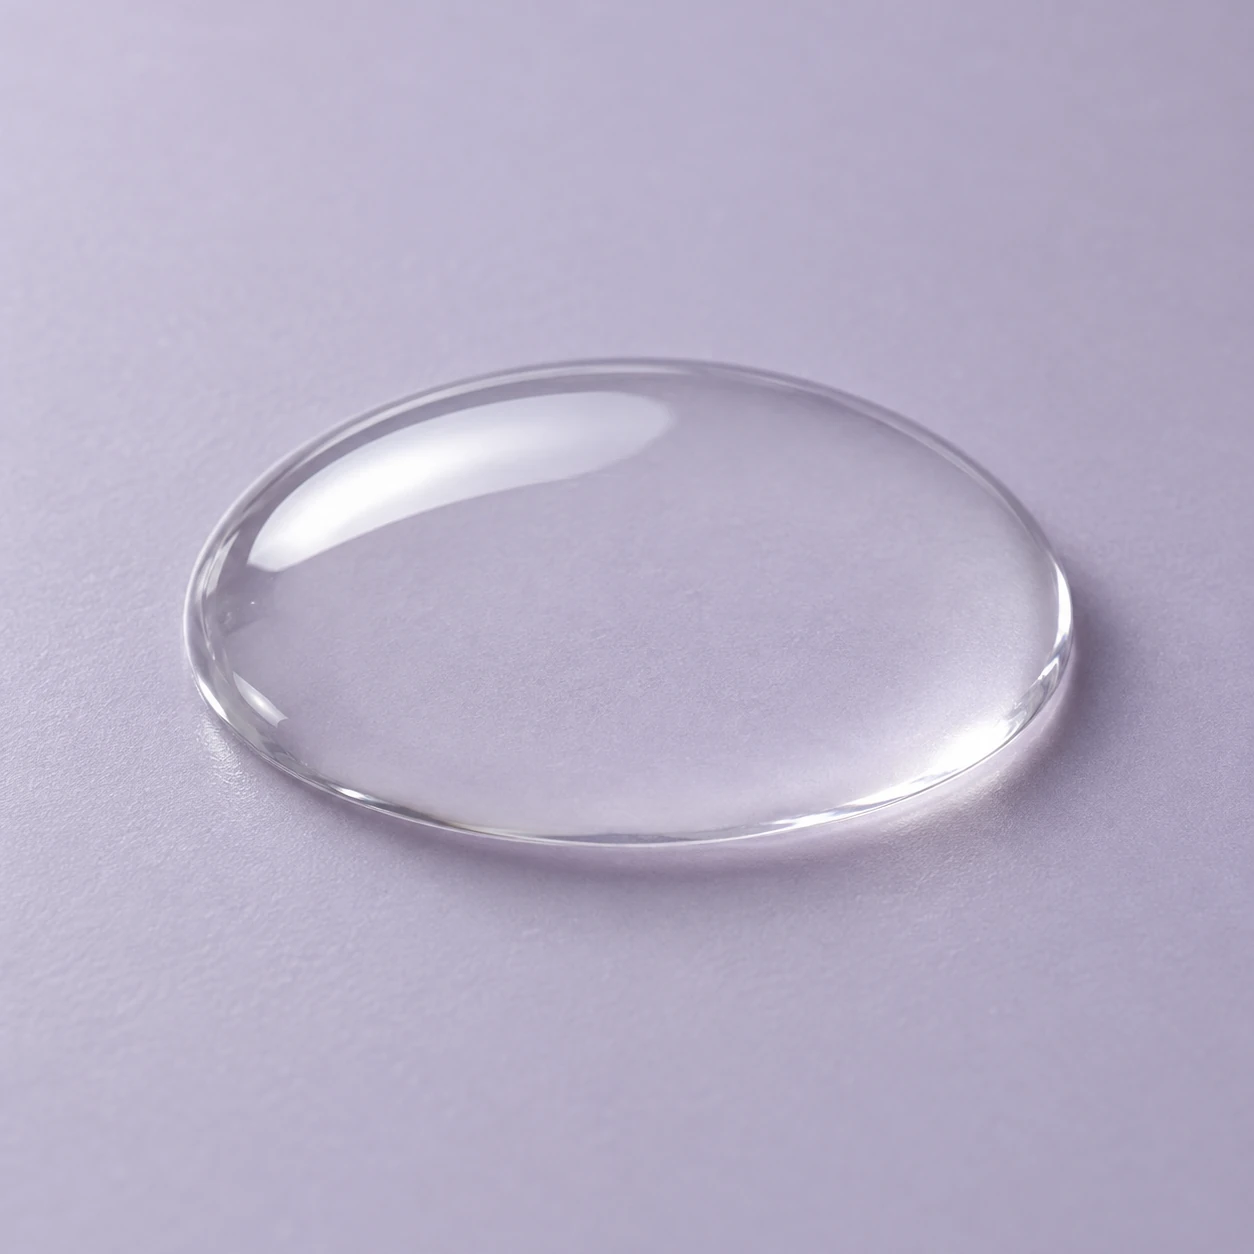
Use serum droplet photography prompts to show a settled liquid boundary without a pipette or a falling splash. Keep the entire perimeter readable; an attractive reflection alone does not define where the liquid ends.
Task: Photograph a single serum droplet as a controlled close-up of transparency and wet edges.
Subject: One colorless fictional skincare serum droplet forming a low rounded dome on a smooth matte pale-lavender glass tile; the tile color remains visible through its middle.
Context: A product photographer needs a clear-liquid texture concept for planning a real formula shoot.
Style: Photoreal macro still life with precise wet edges, subtle refraction and natural lens perspective.
Composition: Square frame at a low three-quarter angle, the entire oval droplet footprint visible near the center. Keep the tile plane readable across the frame and leave clean space around the droplet.
Lighting: One large diffused rectangular softbox above left, a soft elongated reflection across the upper droplet and a restrained edge shadow.
Constraints: Exactly one droplet resting on the tile, with a closed wet perimeter and a low dome. Clear liquid, not a crystal bead or a suspended sphere. No pipette, bottle, splash, falling liquid, bubbles, text, props, glow or extra drops.
Output: One finished 1:1 image at the closest supported native size. A single continuous photographic scene, not a collage, contact sheet, illustration or mockup interface.
- Count one droplet resting directly on the support.
- Follow the full curved boundary and small contact shadow.
- Exclude a falling stream, pipette and suspended splash.
Adjust the brief
- Form
- One settled rounded droplet with a clear boundary.
- Support
- A quiet neutral surface that separates from the transparent material.
- Highlight
- One broad controlled reflection instead of multiple bright points.
If the image misses the brief
If the drop becomes a glass marble, ask for a low flattened liquid dome with a broad wet footprint and remove spherical or gem-like language.
Translucent gel fold
Designers exploring a translucent gel macro.
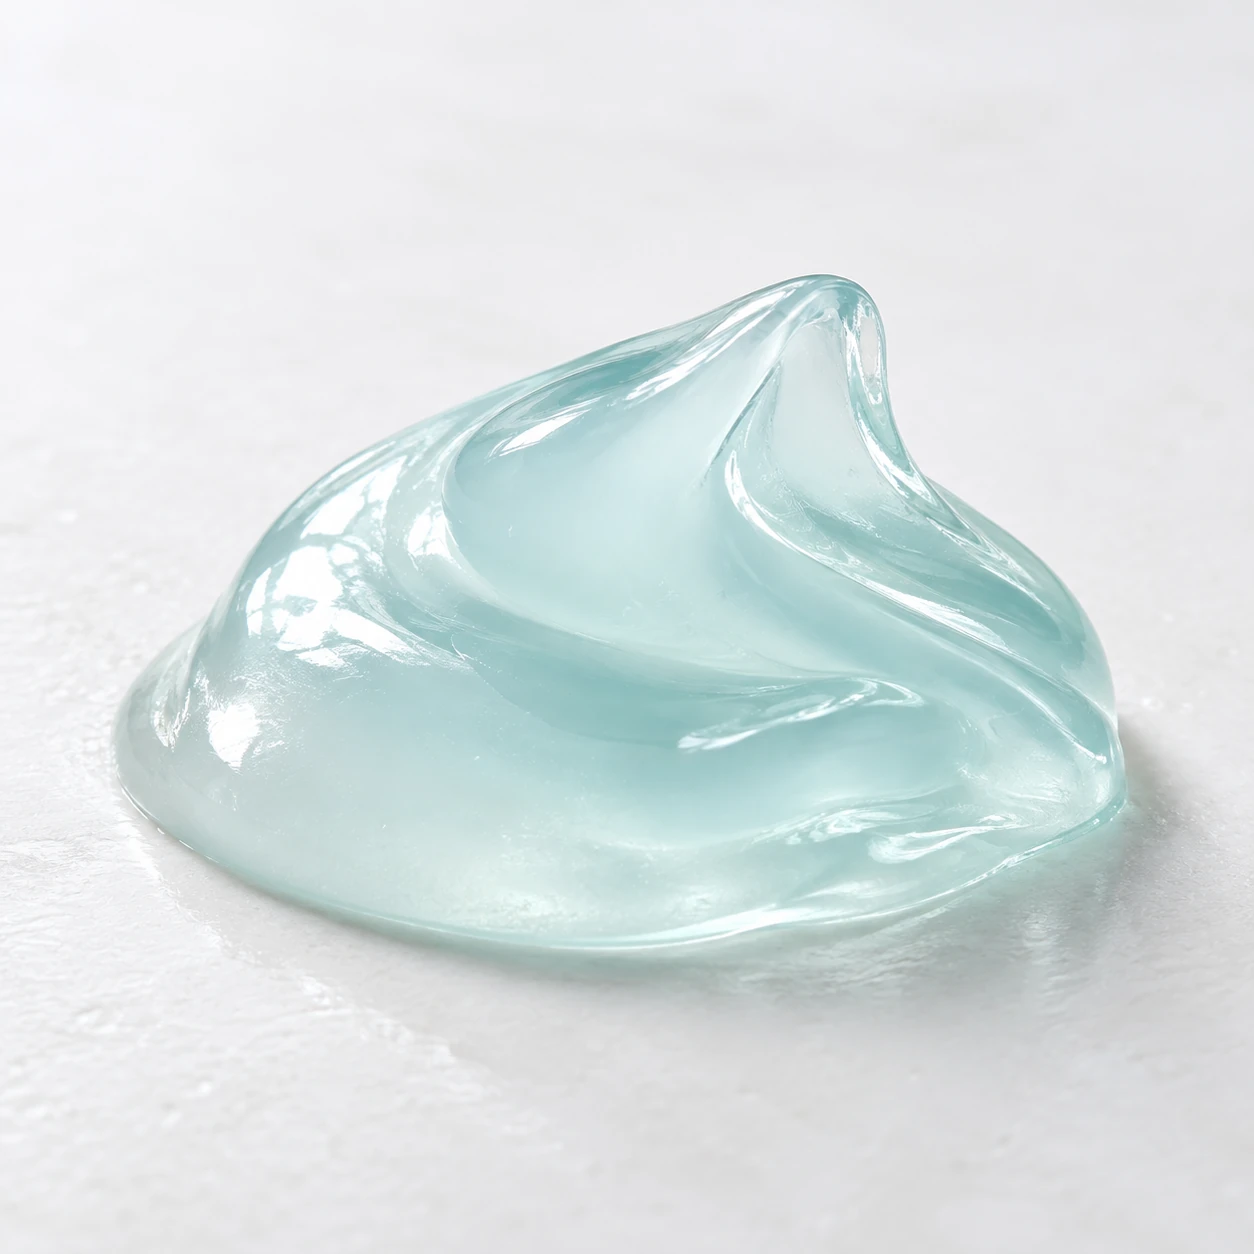
Use a single fold to show how thickness changes across a soft translucent material. Keep the fold connected so separate pieces or rigid fragments cannot stand in for the intended shape.
Task: Photograph one skincare gel swatch to show a soft translucent fold and its contact with a surface.
Subject: One pale-aqua fictional gel dollop shaped into a short low folded mound, with a gently curled ridge and a broad base touching a matte white tile.
Context: A designer needs a gel texture reference that is visibly different from opaque cream and free-flowing serum.
Style: Photoreal close-up product still life with soft hydrogel-like material, delicate surface highlights and realistic shallow depth of field.
Composition: Square frame, three-quarter camera angle slightly above the mound. Include its complete base and peak with white space around every side; keep the main fold and front contact edge sharp.
Lighting: Broad soft light from behind left to reveal partial transmission through the thin fold, with gentle frontal fill so the thicker base remains readable.
Constraints: Exactly one soft connected gel mound, thin edges more translucent than the thick center. It must sag onto the tile, not stand as hard glass, jelly cubes or plastic. No packaging, utensil, ingredient props, extra dollops, bubbles, text or watermark.
Output: One finished 1:1 image at the closest supported native size. A single continuous photographic scene, not a collage, contact sheet, illustration or mockup interface.
- Trace one connected fold from its thicker part to its thin edge.
- Inspect translucency across the material rather than one bright patch.
- Check soft supported contact and the absence of rigid shards.
Adjust the brief
- Tint
- Clear or a restrained fictional gel tint.
- Fold
- One rounded connected fold with readable thickness.
- Light
- Soft highlights and gentle fill to preserve the translucent edge.
If the image misses the brief
If the gel becomes rigid glass, specify a low sagging mound, rounded folded edge and a broad wet contact base.
Semi-solid balm scoop
Brand teams planning a dense balm texture study.
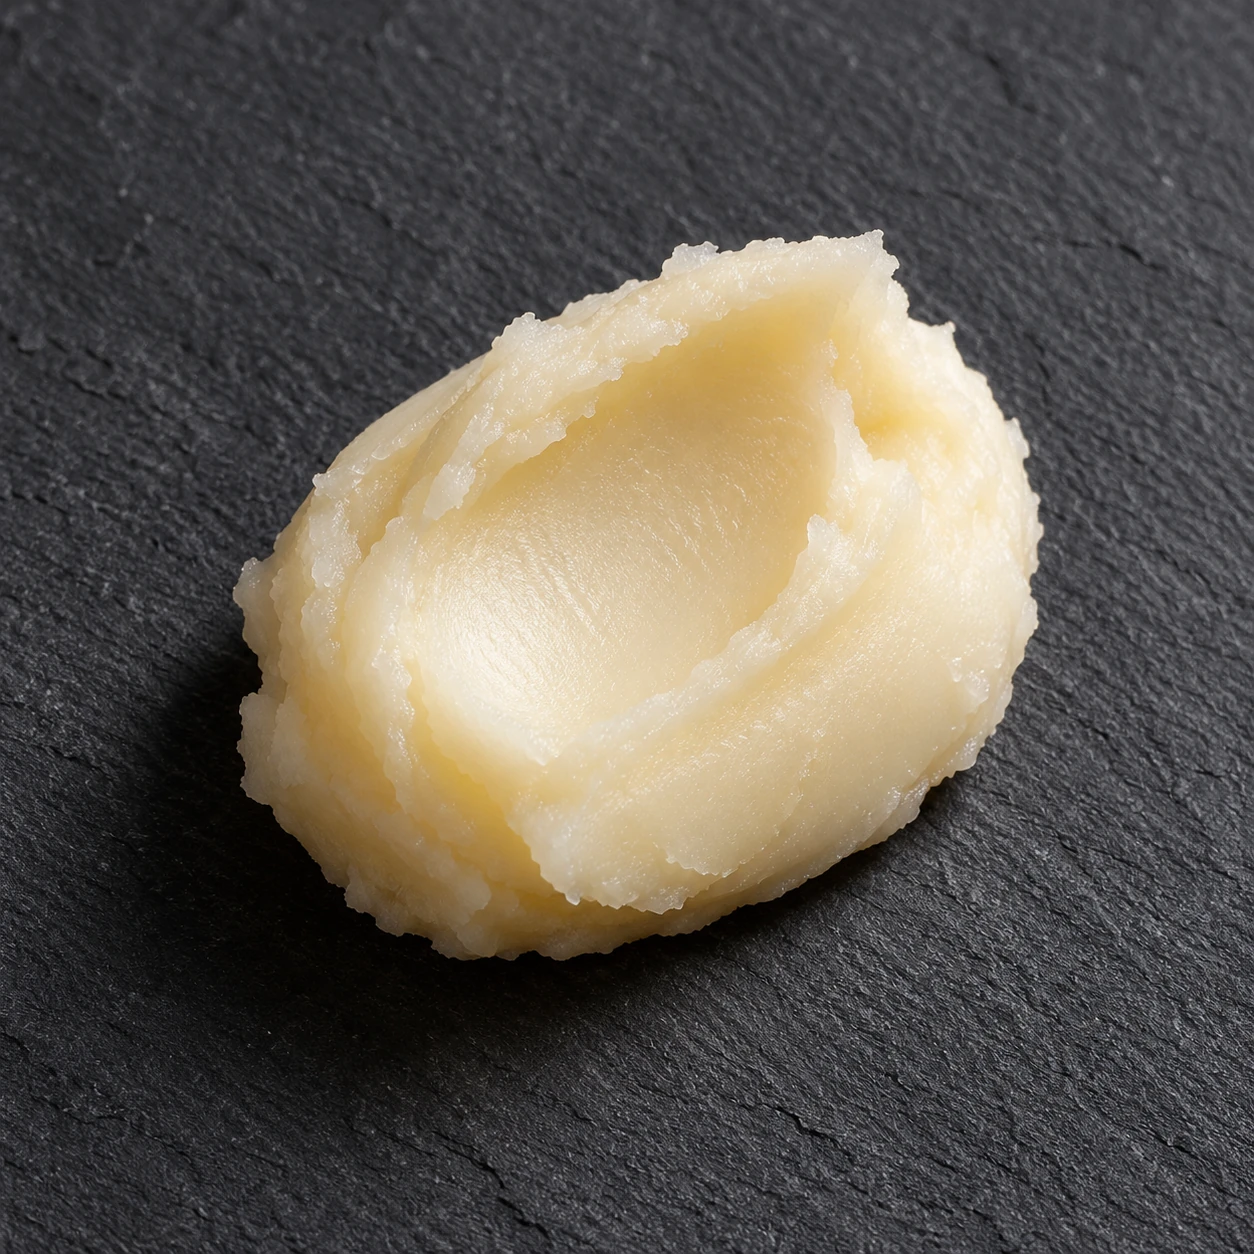
Use a cohesive scoop with shallow tool marks to distinguish a dense material from a poured liquid. The outer edge and the small surface ridges should remain visible at the same time.
Task: Photograph one skincare balm scoop as a close material study of a dense semi-solid.
Subject: One small warm-ivory fictional cosmetic balm scoop, a squat irregular oval with a shallow scoop crease and softly waxy opaque surfaces, resting directly on a matte charcoal slate tile.
Context: A beauty-content team needs a balm consistency concept before arranging photography of the actual formula.
Style: Photoreal macro product still life, subtle tool marks already present in the balm, subdued editorial finish.
Composition: Square frame from forty-five degrees above, entire scoop and its contact edge visible in the central half. Keep the slate plain, clean and dry with no packaging.
Lighting: Large soft key from the right creates broad low-sheen highlights and a short grounded shadow to the left.
Constraints: Exactly one compact balm scoop with an attached crease, no runny puddle, glossy oil ring, whipped peaks or translucent gel. No spoon, fingers, food, fruits, botanicals, crumbs, labels, text, logo or extra scoops.
Output: One finished 1:1 image at the closest supported native size. A single continuous photographic scene, not a collage, contact sheet, illustration or mockup interface.
- Count one cohesive mound, without detached pieces.
- Inspect shallow tool marks and a continuous supported edge.
- Exclude utensils, jars and food-like decorative props.
Adjust the brief
- Tone
- Pale warm or neutral balm color for a fictional concept.
- Surface
- A few shallow scoop marks with restrained sheen.
- Framing
- Leave margin around the entire mound and its contact shadow.
If the image misses the brief
If it becomes whipped cream or butter food styling, simplify to a compact opaque cosmetic balm with a waxy surface and no food or utensil.
Matte clay-mask swatch
Art directors comparing matte cosmetic swatch treatments.
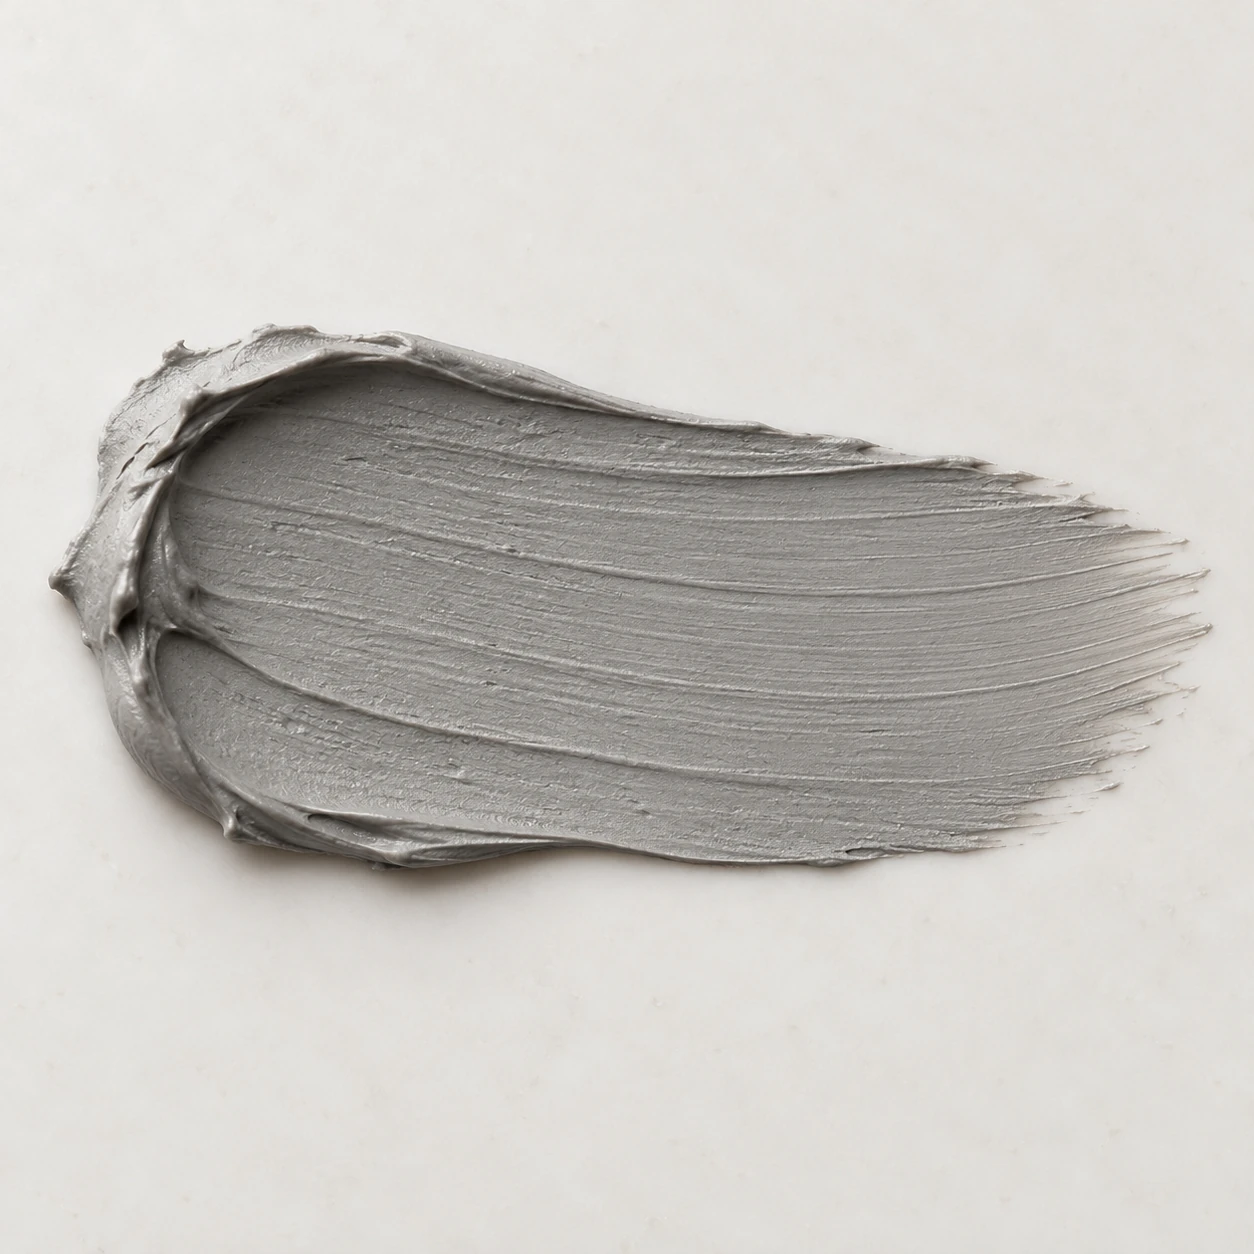
Use a single clay-mask swatch to explore a quiet matte surface. Preserve fine spreading marks so the material does not become a perfectly smooth slab or a set of cracked fragments.
Task: Photograph one clay-mask texture swatch to show a matte spread and fine drag lines.
Subject: One fictional muted-grey cosmetic mask swatch, a short broad swipe with fine parallel drag grooves, a thicker starting edge and a thin feathered ending edge.
Context: A cosmetic photographer needs a surface-finish concept; the image should communicate visible texture without identifying ingredients or promising skin results.
Style: Photoreal high-detail product macro with restrained roughness, dry-looking matte highlights and no decorative styling.
Composition: Top-down square frame on a smooth warm-white ceramic slab. Show the full horizontal swatch with clear margins, all edges resting on the slab and the groove pattern easy to inspect.
Lighting: Low broad diffused raking light from the top of the frame, mild fill from below, enough directional shading to reveal grooves without harsh black shadows.
Constraints: Exactly one connected grey mask swipe, mostly matte and smooth with very fine grains, not rock, sand, cracked earth or cement. No containers, tools, hands, mud splashes, ingredient props, labels, text or extra swatches.
Output: One finished 1:1 image at the closest supported native size. A single continuous photographic scene, not a collage, contact sheet, illustration or mockup interface.
- Count one connected swatch with its whole outline visible.
- Inspect matte surface detail and a readable spread direction.
- Check for unwanted cracks, loose powder or detached fragments.
Adjust the brief
- Palette
- A muted fictional clay tone against a contrasting neutral.
- Finish
- Matte surface with fine spreading marks.
- Outline
- One complete bounded swatch with a tapering edge.
If the image misses the brief
If it resembles cracked stone, specify a smooth fresh cosmetic paste with only very fine grain and uninterrupted soft edges.
Connected cleanser foam cluster
Creators planning a cleanser-foam detail image.
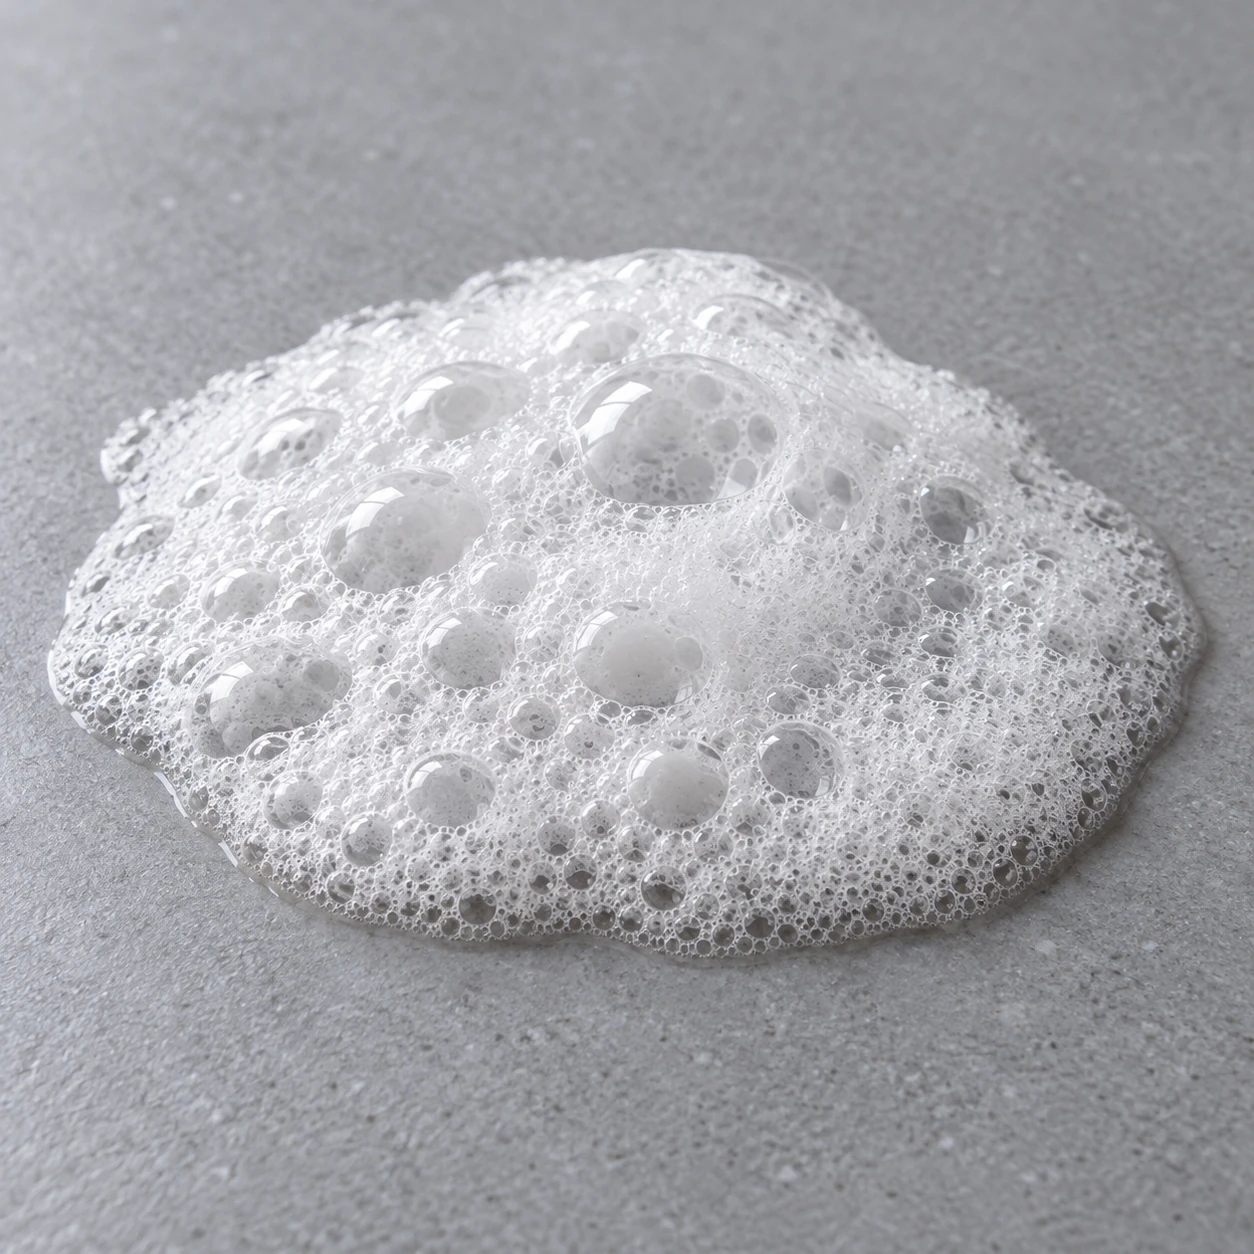
Use one compact foam cluster to give large and small bubbles a clear relationship. Keep enough of the support visible to avoid an unbounded field that loses the cluster's overall shape.
Task: Photograph one cleanser-foam patch to inspect connected bubbles at different sizes.
Subject: One compact white fictional cosmetic foam patch consisting of connected small and medium bubbles, gently domed in the middle and thinning toward its outer edge on a matte cool-grey tile.
Context: A creative team needs a foam texture concept for a cleanser visual brief, without a handwashing scene or performance claim.
Style: Photoreal macro still life with delicate bubble walls, a few readable larger bubbles and controlled translucency.
Composition: Square frame from a shallow downward angle, the whole foam patch and its supporting tile visible with space around it. Focus across the front edge and central bubbles.
Lighting: A large diffused softbox from upper left and a broad white fill create soft reflections on individual bubbles without blown-out white patches.
Constraints: One connected foam cluster resting on the tile; no isolated airborne bubbles, water splash, bottle, sink, tap, hands, cream frosting, dust or extra foam patches. No text, logos or watermark. Keep bubble walls visible and the base in contact with the tile.
Output: One finished 1:1 image at the closest supported native size. A single continuous photographic scene, not a collage, contact sheet, illustration or mockup interface.
- Count one foam cluster with a clear support relationship.
- Inspect the variation between small and larger bubbles.
- Exclude airborne bubbles, a pouring stream and extra containers.
Adjust the brief
- Bubble scale
- A few larger bubbles supported by finer surrounding foam.
- Cluster
- One compact mound with a complete visible boundary.
- Highlights
- Soft restrained reflections that leave bubble edges readable.
If the image misses the brief
If it looks like whipped cream, ask for hollow translucent bubble walls and a few clearly separated large bubble interiors within the same connected patch.
Facial-oil pool and meniscus
Product-image teams exploring a facial-oil surface study.
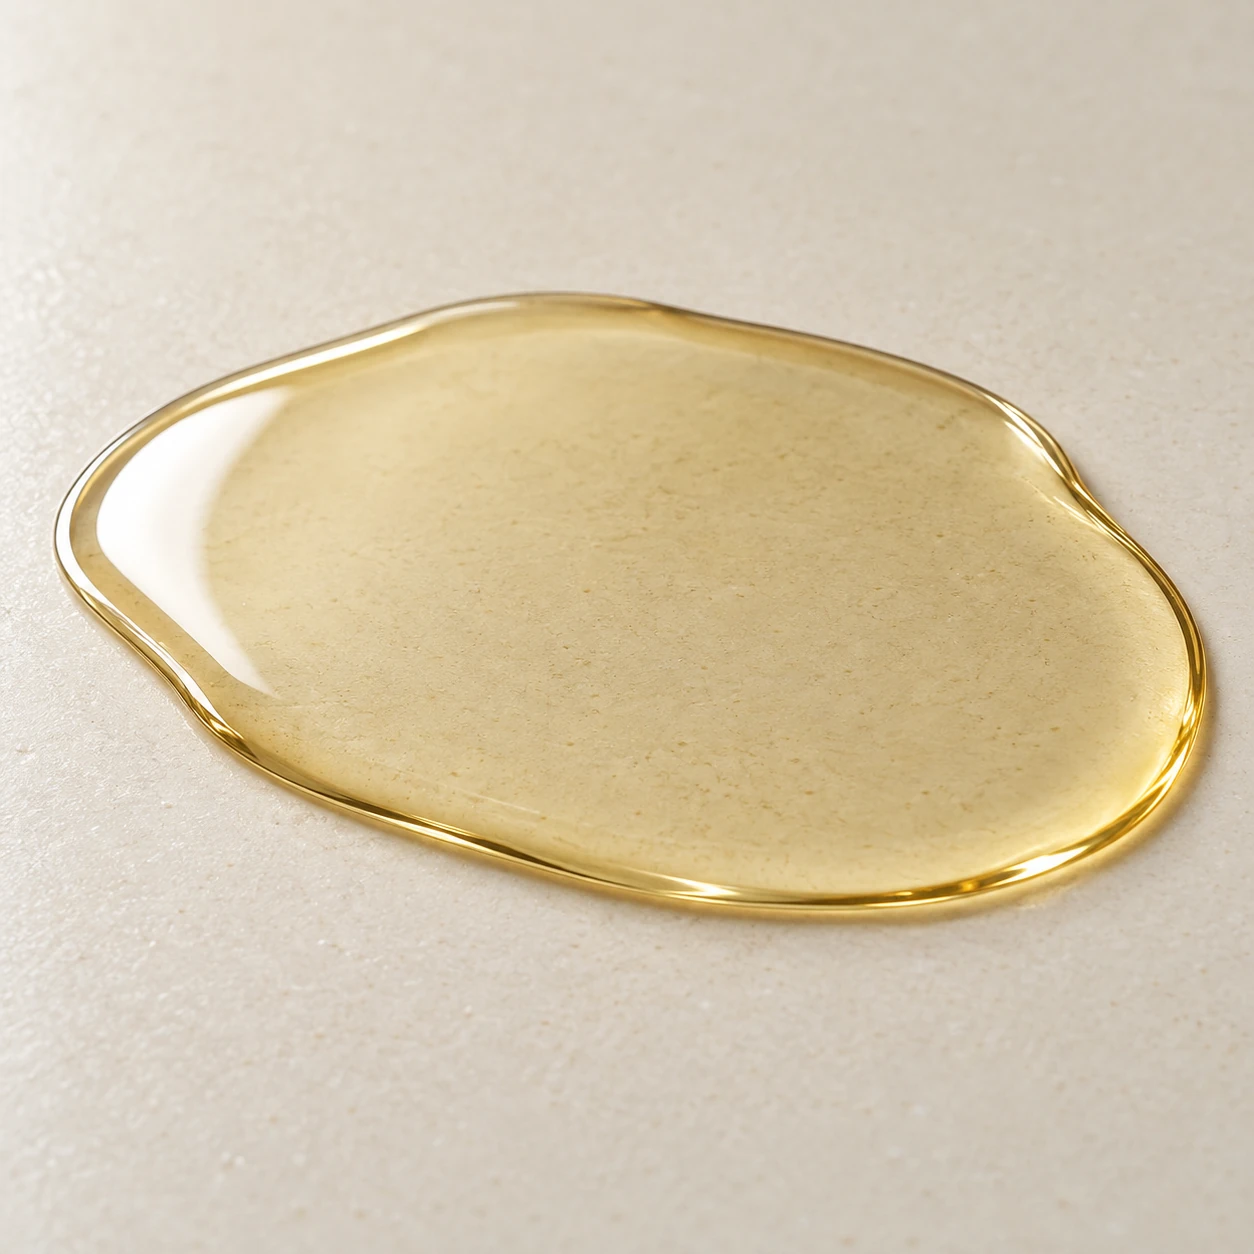
Use a shallow bounded pool to make a liquid surface readable without dramatic splashing. Keep the full outline in frame and distinguish the pool from the dry surrounding support.
Task: Photograph one shallow facial-oil pool to show its continuous wet boundary and reflective surface.
Subject: One fictional pale-gold cosmetic oil pool, a low irregular oval spread thinly on a smooth matte cream-colored glass tile, with a gently raised meniscus around its full perimeter.
Context: A skincare photographer needs a reflective-liquid material study before using a verified real formula reference.
Style: Photoreal macro product photograph with restrained fluid reflections and visible tile texture through the thin oil.
Composition: Square frame, low three-quarter camera view. Show the entire shallow pool and perimeter in the central two-thirds with a continuous tile plane and clean empty margins.
Lighting: Broad diffused white strip light from the left creates one long soft reflection, with low fill on the opposite side and no colored glow.
Constraints: Exactly one connected shallow pool in contact with the tile, nearly flat rather than a tall dome. No bottle, dropper, falling stream, separate droplets, splash, floating beads, flowers, seeds, food styling, text or extra objects.
Output: One finished 1:1 image at the closest supported native size. A single continuous photographic scene, not a collage, contact sheet, illustration or mockup interface.
- Count one settled pool with no separate satellite droplets.
- Follow the continuous boundary around the entire liquid shape.
- Inspect a restrained highlight and exclude a falling splash.
Adjust the brief
- Tone
- Clear to pale-gold fictional oil, without ingredient symbolism.
- Outline
- One shallow continuous pool with visible surrounding dry support.
- Reflection
- A broad soft reflection placed inside the boundary.
If the image misses the brief
If it becomes a suspended golden sphere, specify a broad almost-flat liquid footprint and a complete thin wet perimeter.
Continuous lotion ribbon
Designers planning a lotion-ribbon close-up.
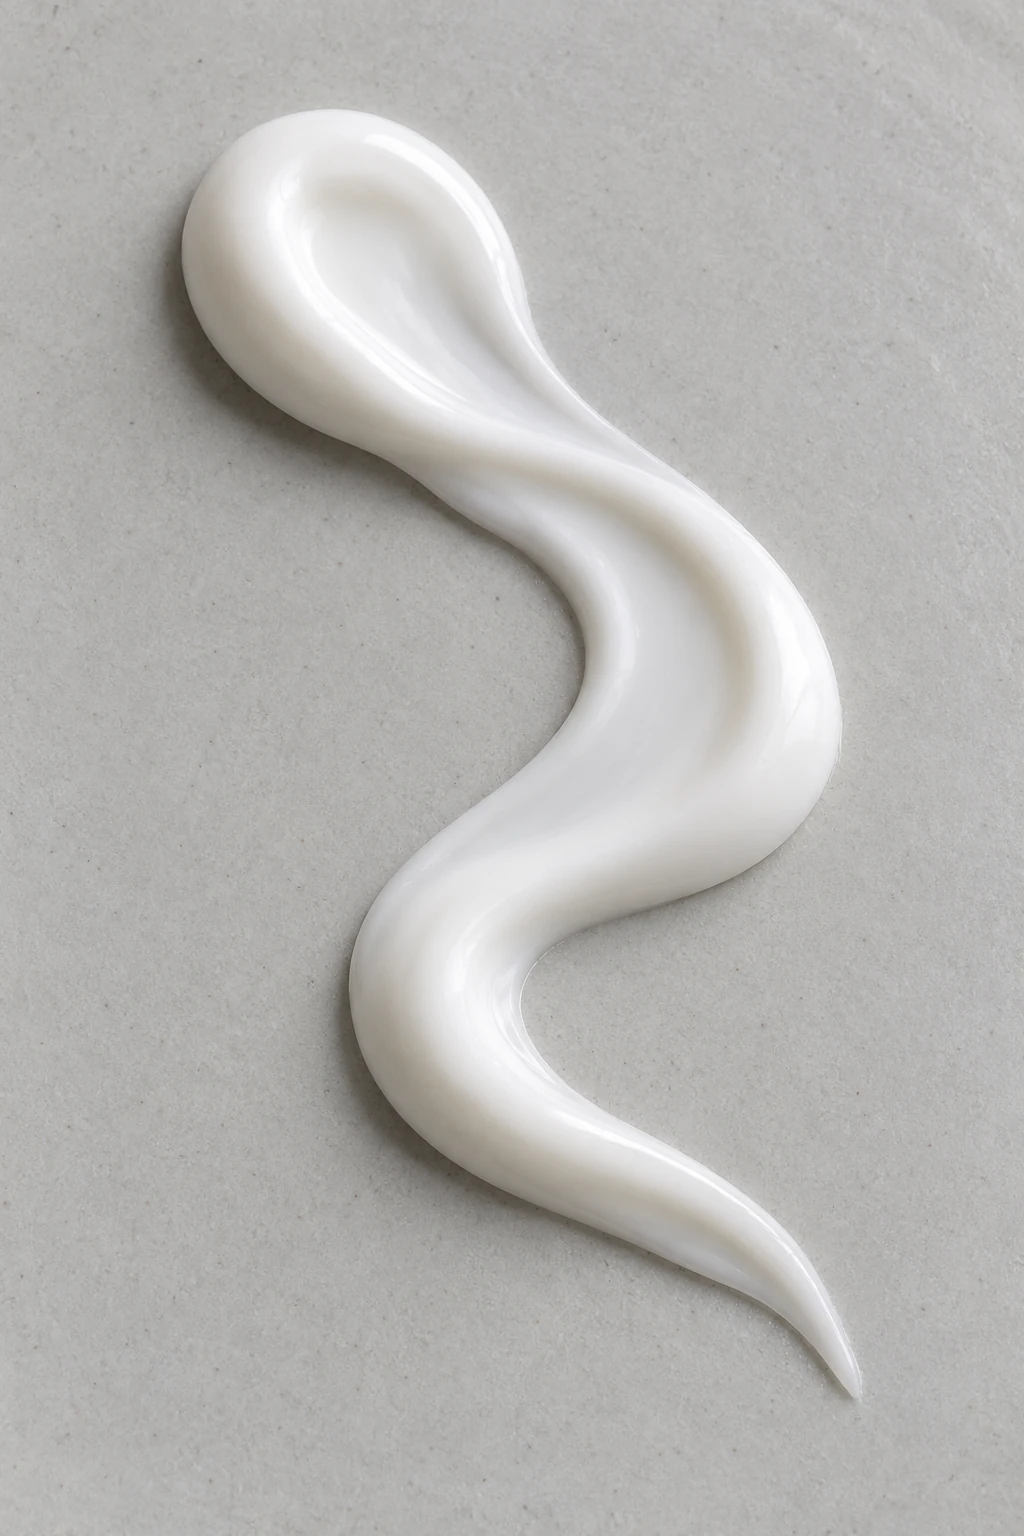
Use one continuous ribbon to make thickness and direction visible. Trace its beginning, bend and end before judging the styling, because a ribbon can gain a second strand or a disconnected tip.
Task: Photograph one lotion ribbon to study a flowing opaque fold and thickness changes.
Subject: One fictional white cosmetic lotion ribbon laid in a loose single S curve on a matte pale-grey ceramic plate surface, with a rounded thicker beginning, a low soft central fold and a thin tapered ending.
Context: A designer needs a portrait texture composition for a beauty-content layout without packaging or ingredient claims.
Style: Photoreal studio macro, silky opaque lotion, broad soft highlights and subtle surface irregularities.
Composition: Portrait two-by-three frame from overhead. The complete S-shaped ribbon runs vertically through the central half with visible space around both ends; show continuous support below every part.
Lighting: Large diffused side light from the upper right and soft frontal fill make the thickness and shallow fold readable.
Constraints: Exactly one continuous low lotion ribbon touching the plate, opaque throughout with a soft shallow fold. No airborne arc, dispensing nozzle, tube, spoon, hands, food, separate drops, second ribbon, text, logo or watermark.
Output: One finished 2:3 image at the closest supported native size. A single continuous photographic scene, not a collage, contact sheet, illustration or mockup interface.
- Trace one ribbon from end to end without a break.
- Inspect the supported bend and consistent material appearance.
- Exclude a dispensing nozzle, extra strands and suspended liquid.
Adjust the brief
- Curve
- One simple connected bend with both ends in frame.
- Finish
- Smooth opaque material with a restrained satin sheen.
- Camera
- An angle that shows the upper surface and supported side.
If the image misses the brief
If the ribbon becomes a tall floating strand, ask for a low S-shaped smear resting against the surface along its entire length.
Three distinct texture samples
Creative teams comparing three fictional formula appearances.
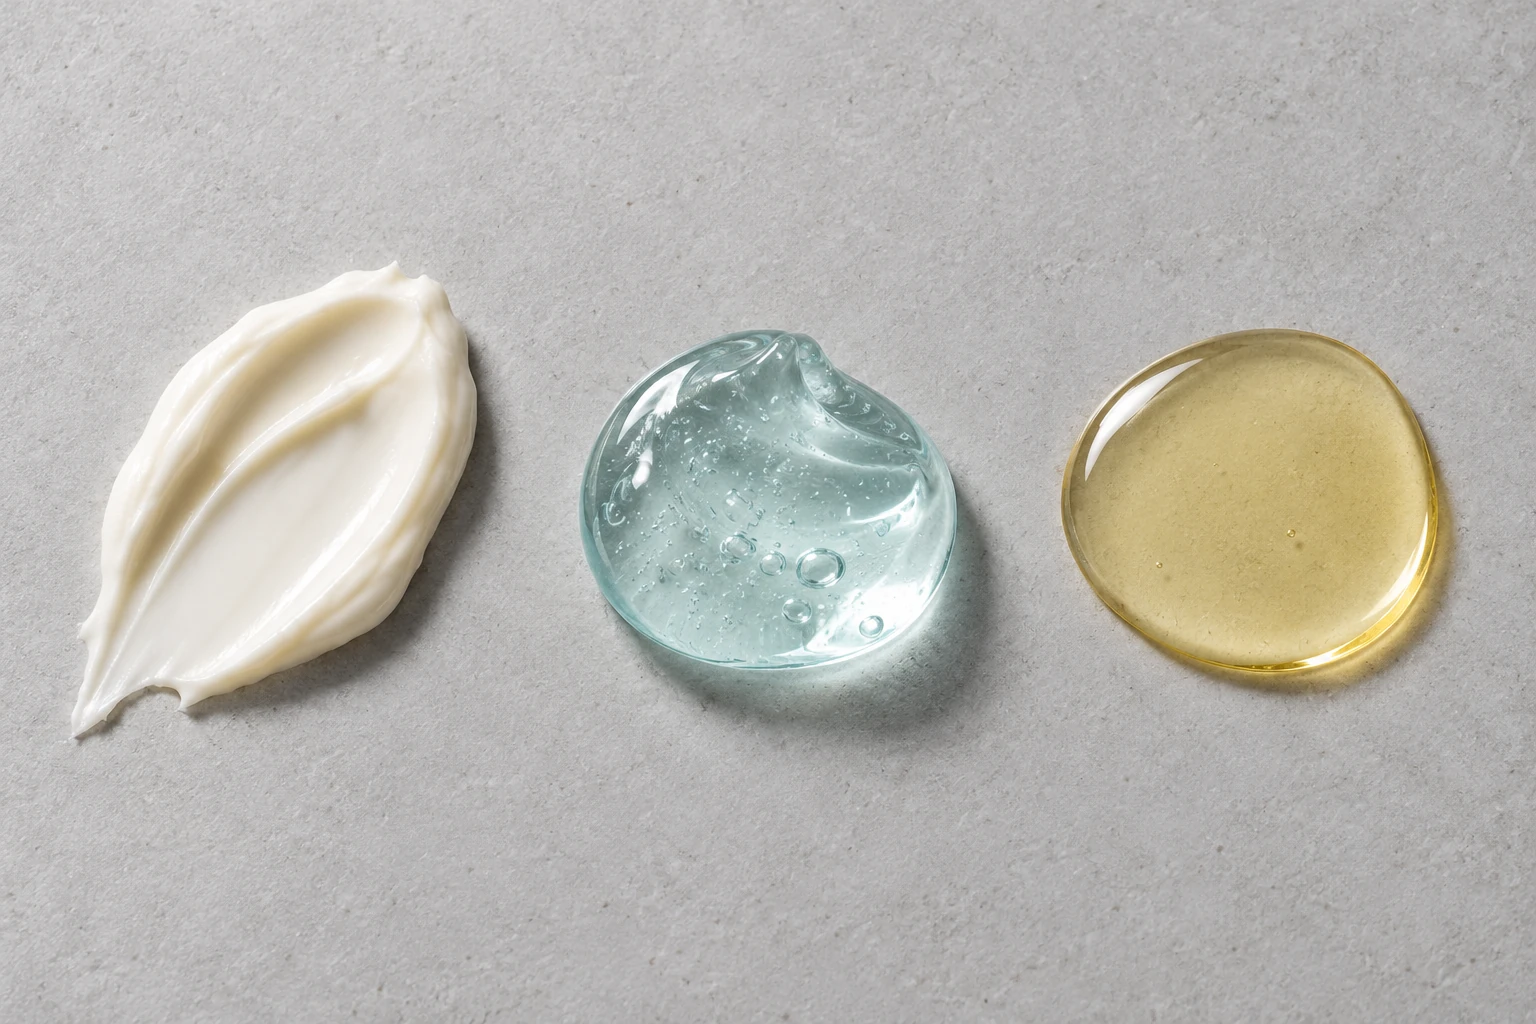
Use separate cream, gel and oil samples to compare visible opacity and shape under shared light. The arrangement is a visual study; it does not compare benefits, ingredients or measured material properties.
Task: Photograph a side-by-side material comparison of three fictional skincare textures under one lighting setup.
Subject: Exactly three separated samples: one opaque ivory cream swipe on the left, one pale-aqua translucent gel mound in the center, and one shallow pale-gold oil pool on the right.
Context: A creative team needs a qualitative texture comparison for briefing, not a measured viscosity test or a claim that different products are equivalent.
Style: Photoreal overhead product still life with matched scale, restrained color and clear material differences.
Composition: Landscape three-by-two frame on one continuous matte light-grey ceramic slab. Arrange the three complete samples in a straight horizontal row with generous gaps and empty margins. Make them similar in visual footprint without forcing identical shapes.
Lighting: One broad softbox above left produces a shared shadow direction; soft fill preserves the cream ridges, gel transmission and oil meniscus simultaneously.
Constraints: Exactly three samples, each touching the slab and separated by a clean dry gap. Cream opaque, gel softly translucent, oil thin and reflective. No labels, dividing lines, panels, collage, containers, utensils, people, ingredients, text, logos or extra samples.
Output: One finished 3:2 image at the closest supported native size. A single continuous photographic scene, not a collage, contact sheet, illustration or mockup interface.
- Count exactly three separated material samples.
- Inspect complete boundaries and empty gaps without merged edges.
- Check consistent lighting and the absence of labels or benefit claims.
Adjust the brief
- Arrangement
- Three clear positions with empty gaps between samples.
- Contrast
- Distinct opacity and shape for cream, gel and oil.
- Setting
- One shared neutral support and one light direction.
If the image misses the brief
If the samples merge, widen the clean dry gaps and repeat left cream, center gel, right oil; keep all three footprints completely visible.
Blank tube beside one cream swatch
Beauty brands planning a packaging-and-swatch concept.
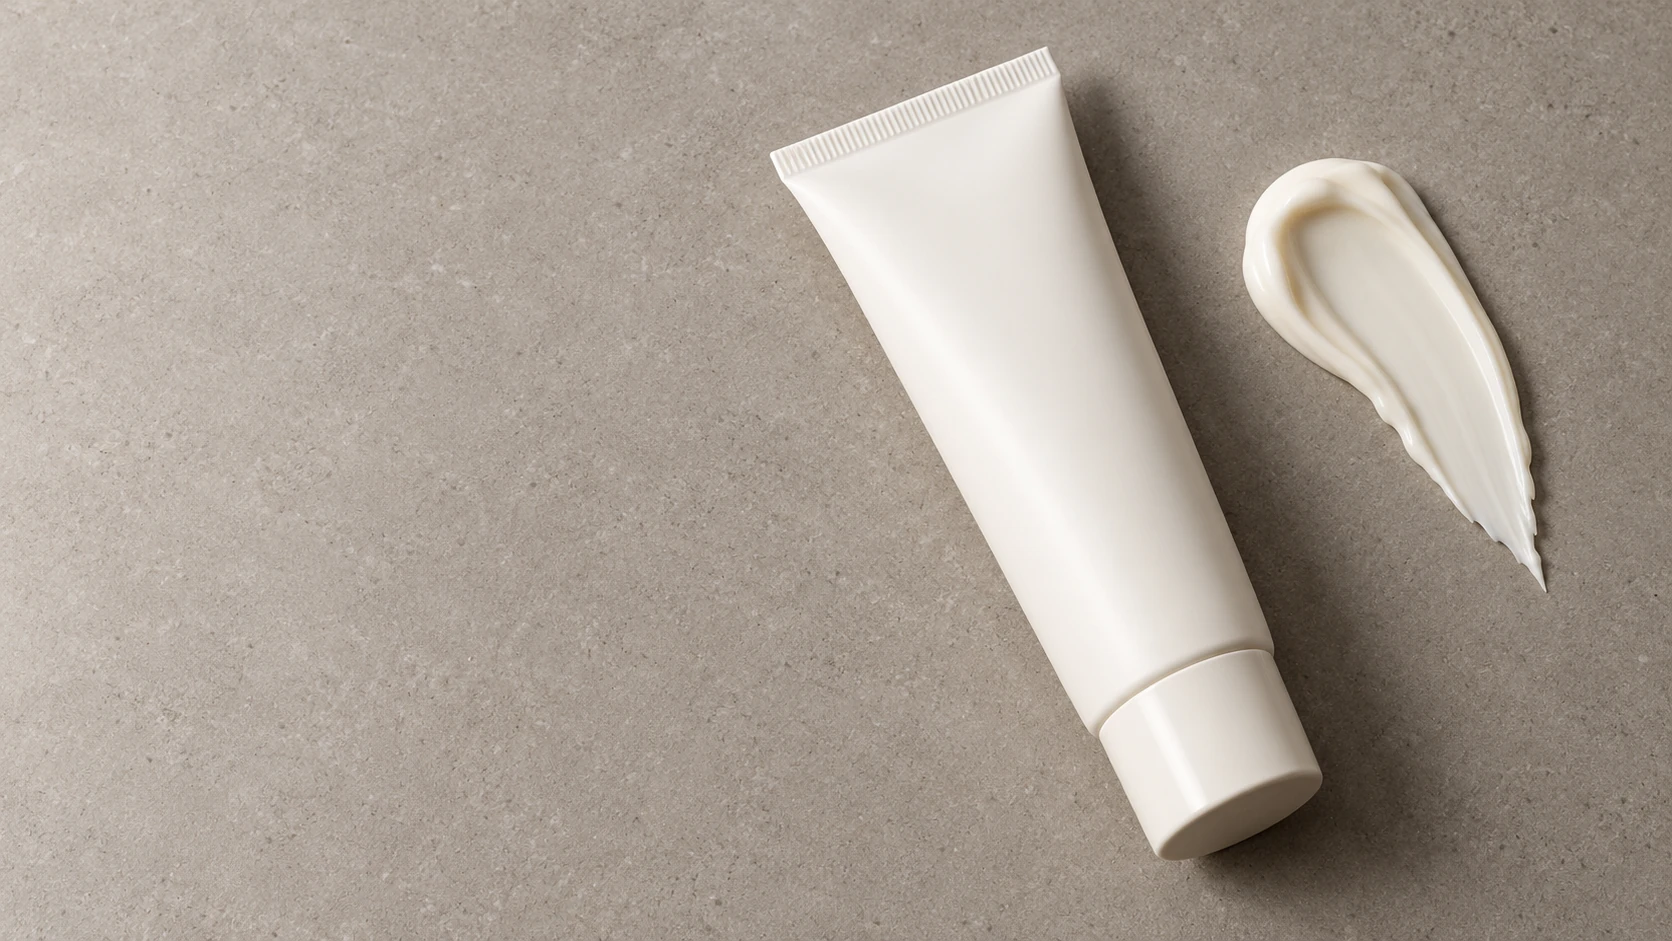
Use one blank tube and one separate cream swatch to explore a clear product-image hierarchy. Treat the paired appearance as fictional art direction until actual packaging and formula references are checked.
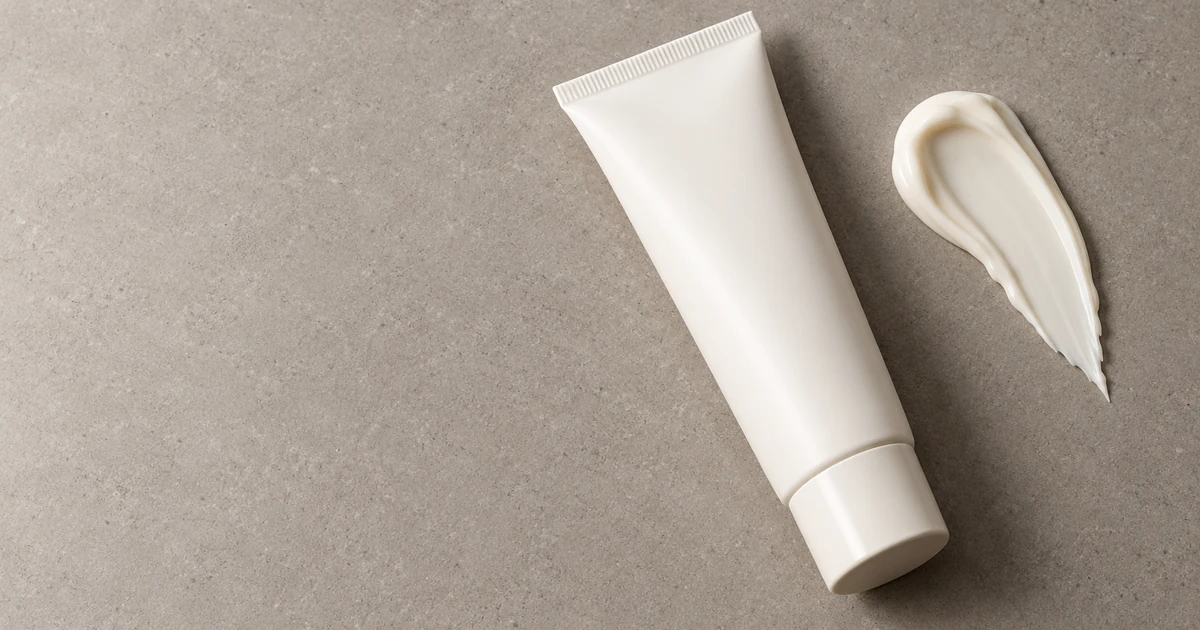
Task: Photograph a fictional skincare tube with one texture swatch as a wide content-layout concept.
Subject: One plain unbranded off-white cosmetic squeeze tube lying diagonally on a warm-grey matte ceramic slab, its screw cap firmly closed; beside it sits one short opaque ivory cream swipe with a thick ridge and tapered end.
Context: A beauty art director needs a visual bridge between anonymous packaging and a texture study, leaving room to add verified product copy later.
Style: Photoreal clean commercial still life with a soft satin tube surface, visible cream ridges and restrained natural retouching.
Composition: Landscape sixteen-by-nine frame from overhead. Keep the complete closed tube and the separate swatch grouped in the right two-thirds, with a clean gap between them and quiet empty space in the left third. All objects rest on the same slab.
Lighting: Large diffused softbox to the left casts short consistent shadows and broad soft highlights; keep the cream opaque and the tube silhouette distinct.
Constraints: Exactly one closed tube, one attached cap and one cream swipe, no contact between tube and swatch. No dispensing stream, open nozzle, detached cap, label, letters, logo, product claims, hands, ingredient props or extra packaging. Do not imply the fictional swatch proves any real formula.
Output: One finished 16:9 image at the closest supported native size. A single continuous photographic scene, not a collage, contact sheet, illustration or mockup interface.
- Count one tube, one closure and one cream swatch.
- Inspect complete packaging edges, support and separation from the sample.
- Exclude invented print, ingredients, extra tubes and clinical comparison graphics.
Adjust the brief
- Tube
- One unbranded tube with a complete closure and visible base.
- Swatch
- One separate opaque cream sample with clear spacing from the tube.
- Layout
- Keep both complete shapes readable and leave margin for later design work.
If the image misses the brief
If the cap becomes detached or cream streams from the tube, restate closed attached cap and one separate pre-placed swatch with a clean gap.
Make skincare macro photography readable with light
A broad side light gives a raised swipe a readable edge and leaves a gradual highlight across its surface. A low camera angle can emphasize thickness; an overhead angle can clarify outline and separation. Choose the angle around the feature you need to inspect. A dramatic crop is less useful when it removes the contact point or hides the boundary of a translucent sample.
For serum and gel texture photography, leave enough tonal difference between the material and its support to see the shape. Ask for restrained highlights and a distinct curved or folded edge. For cream, balm and clay-mask studies, preserve the difference between a glossy surface, a satin sheen and a matte finish. Check the actual image rather than assuming the material word guarantees the requested appearance.
Repair common cosmetic texture photography failures
Review the image at full size and at the intended display size. When a result misses the brief, simplify the instruction and regenerate. Keep the previous result and wording so the effect of the change remains clear.
The cream becomes a liquid puddle
Describe a cohesive, opaque swipe with one raised edge and a visible taper. Remove language about flowing water or splashes. Recheck both the thick end and the thin edge, because a convincing glossy highlight can hide a flat shape.
The serum droplet gains a falling stream
Specify one settled droplet resting directly on the support, with no pipette, falling liquid or suspended splash. Keep the camera far enough back to include its entire boundary and contact shadow.
The gel looks like opaque plastic
Request translucent material with a visible thickness change across one fold. Reduce hard specular glare and keep the background simple. Inspect the full fold rather than judging transparency from one bright patch.
Comparison samples touch or merge
Give each sample a separate position and require visible empty space between them. State the exact count. Keep the lighting and support shared, then inspect all boundaries before adding labels or a more complex background.
Match actual formula appearance with a reference
For a real product image, use photographs you are authorized to work with. Compare the material color, opacity, sheen, bubble structure and amount shown. Check whether a thin spread looks different from a thick mound. Packaging adds another set of checks: tube proportions, closure, seams, print placement and contact with the surface. A plausible fictional tube does not verify the shape of a particular SKU.
A generated texture does not identify ingredients, establish efficacy, measure SPF or predict results for a skin type. Keep those statements tied to the actual product information and appropriate evidence. Describe only the visible features in an image caption. If a formula reference shows an opaque cream, a transparent gel result is a visual mismatch even when the color palette is attractive.
Use the before/after comparison layout tool to place two existing images side by side during review. The tool arranges your inputs; it does not authenticate a product. Continue with the product ads and posters workflow for a campaign layout, or the e-commerce and marketing handbook for wider channel planning.
Skincare texture photography FAQ
How do I write AI skincare texture photography prompts?
Start with the material and one visible form, such as a cream swipe or serum droplet. Define opacity, surface sheen, support, camera angle and light direction. State the exact number of samples, keep the full boundary visible and finish with exclusions. Use the resulting image to inspect those concrete features.
Are these skincare photography prompts free to copy?
Yes. The prompt text is free to copy and adapt. Generating an image depends on the availability and limits of your image tool. Use authorized references when adapting a setup to a real formula, product photograph or brand design, and review the result before publishing.
How do cream texture prompts differ from serum photography prompts?
A cream brief can emphasize opacity, a raised ridge and a tapering spread. A clear-serum brief can emphasize one settled droplet, a continuous curved boundary and controlled reflections. The distinction is a visual instruction. Compare the result with the actual formula when the image needs to represent a real product.
How can I stop a gel texture from looking like glass or plastic?
Describe a soft translucent gel, one rounded fold and a gradual change in visible thickness. Use broad soft light and restrained highlights. Remove hard edges or rigid sculptural language, then inspect the whole fold and its contact with the support after regeneration.
Can generated skincare texture images verify ingredients or product benefits?
No. An image can show a visual concept, but its appearance cannot establish ingredients, efficacy, SPF, skin-type suitability or results on skin. Keep product statements tied to verified information. Use a suitable reference to check visible formula and packaging details.
How should I arrange a skincare texture comparison?
Name three separate materials, assign each a position and leave visible space between them on one support surface. Keep the camera angle and light direction shared. Count each sample and inspect the complete boundaries. Such an arrangement compares fictional appearances, rather than demonstrating relative product performance.
Can I use the blank-tube example for a real skincare listing?
Treat the blank tube and swatch as an art-direction concept. A real listing needs accurate packaging and formula appearance. Work from an authorized reference, compare tube proportions and closure detail, and add genuine artwork in a controlled editing step. Recheck the final image and accompanying wording together.
Which image ratio works for cosmetic texture photography?
Choose the ratio around the placement and the shape you need to show. A square can frame one sample; a wider composition can separate three samples or leave room for later copy. Check current destination requirements, the delivered dimensions and the final crop before use.
Continue with the next product-image task
Keep package design in the product-design prompt handbook, build a layout with the product ads and posters guide, and explore other commercial image tasks in the e-commerce and marketing overview. Each task benefits from its own brief and inspection criteria.